Requirements
How to add KYC requirements (documents, forms and questions)
You can fully customize a KYC Template's requirements to your needs. KYC-Chain provides three types of requirements: Documents, Forms, and Questions.
- Documents: Documents are requirements which the applicant will upload from their computer. They are most often used to request scans or photos of official documents (e.g. Passport, Utility Bill, Company Registry, etc.).
- Forms: Forms are requirements which come in the form of a PDF file that the applicant needs to add information to. The applicant will be prompted to download the pdf form, fill it out on their device, and then upload the filled copy. Forms can be created and configured in the Document Templates section of KYC-Chain.
- Questions: Questions are requirements that require text input from the applicant. They are used to request details in text format (e.g. Date of birth, Taxpayer Identification Number, Residence Address, etc.).
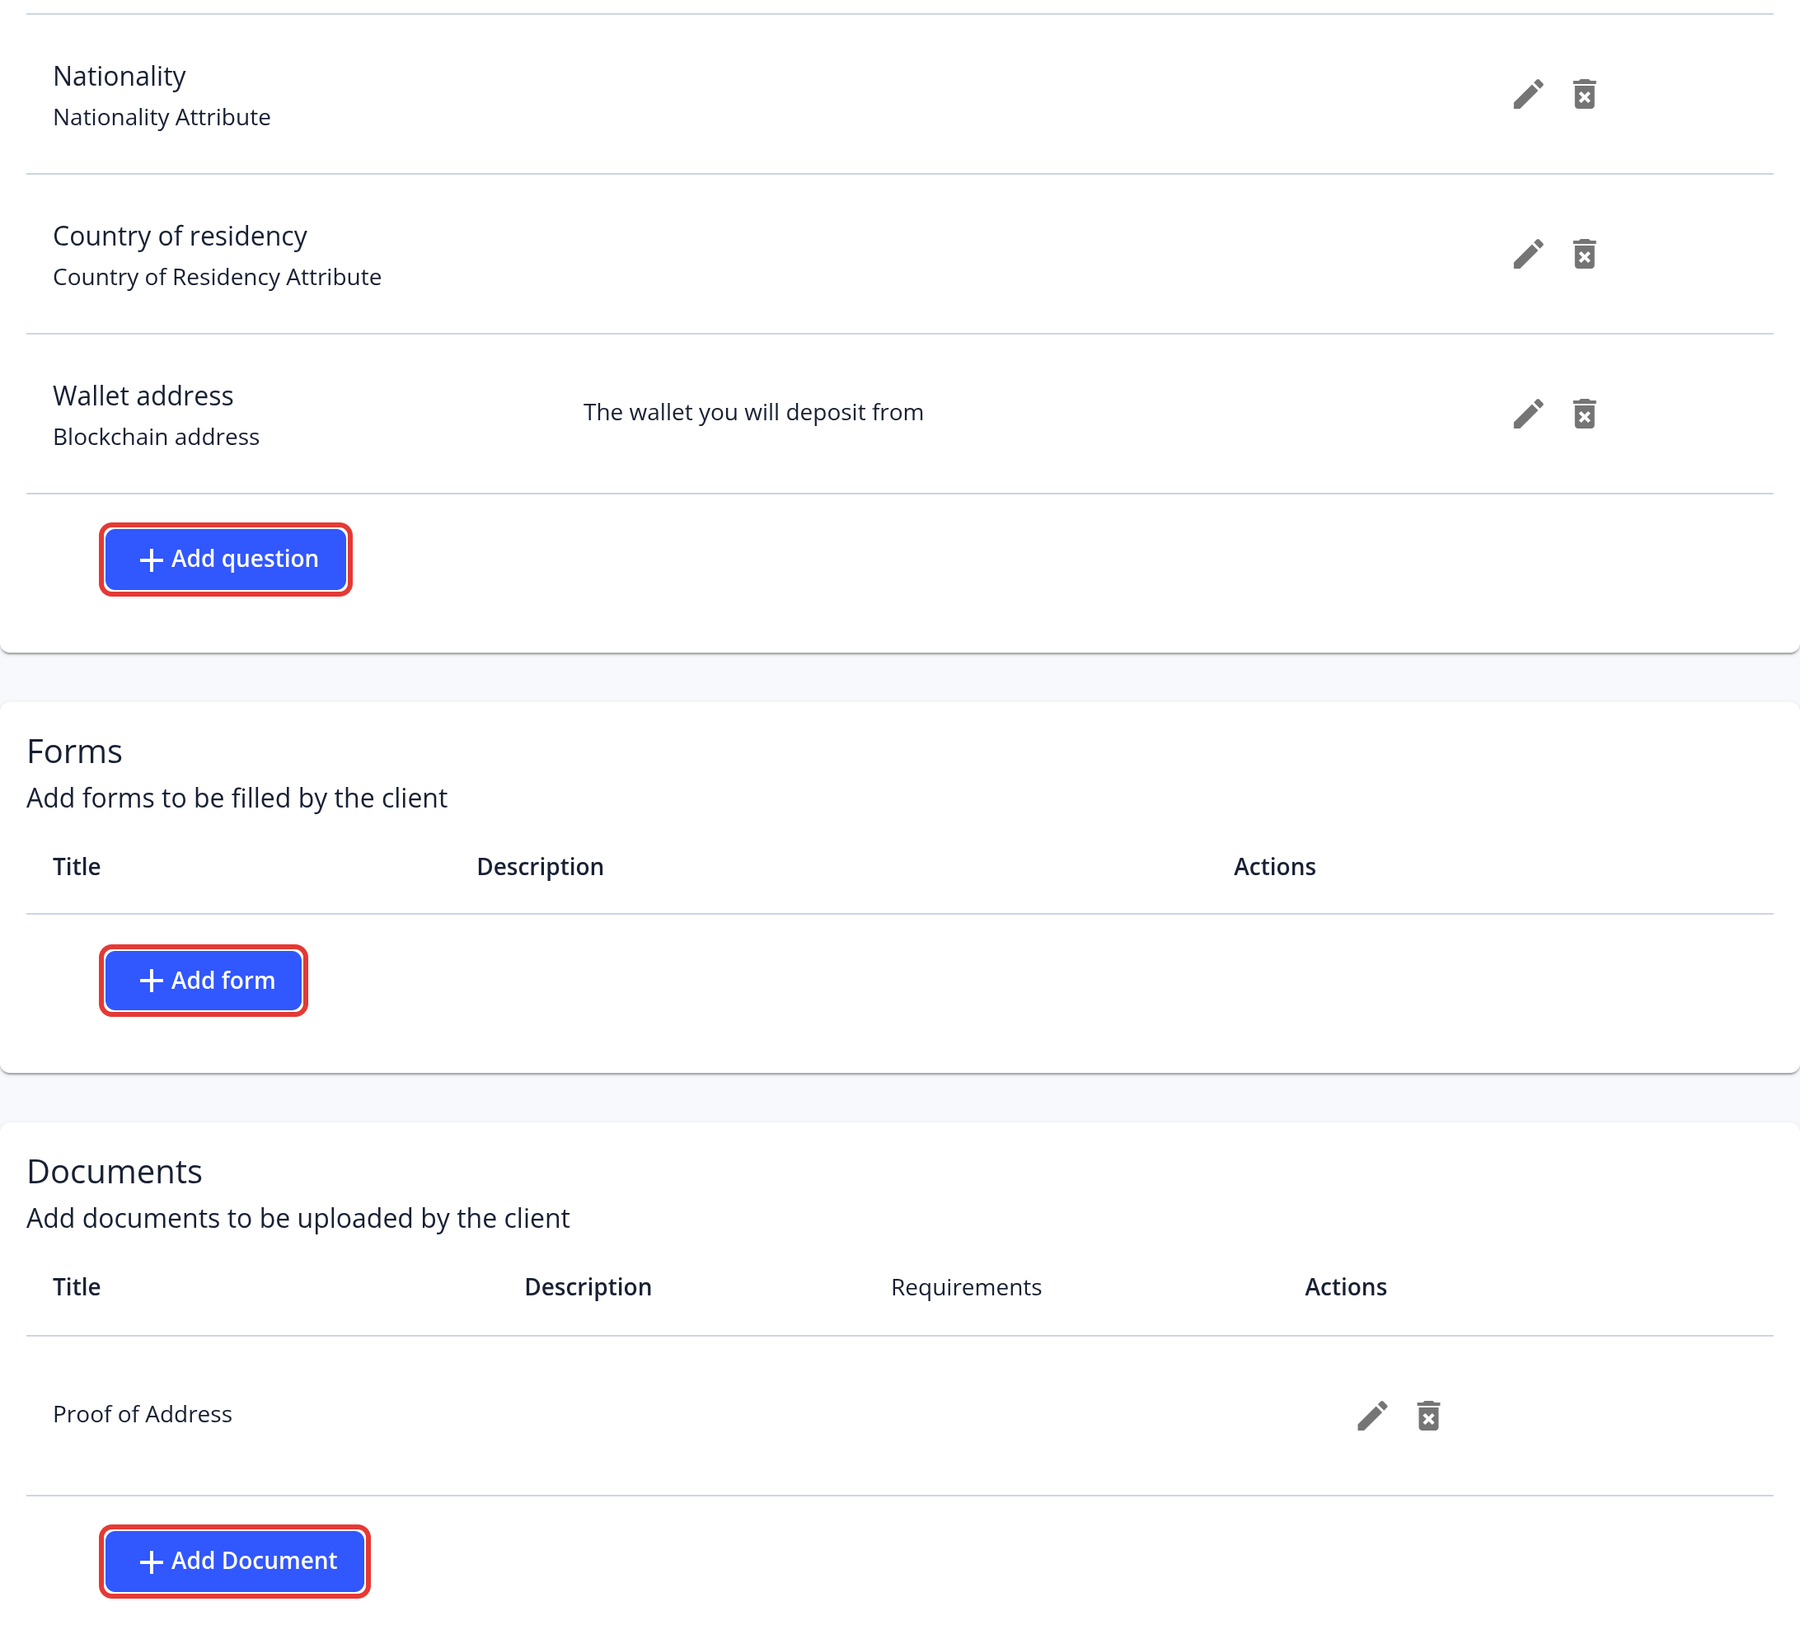
To add requirements, open the KYC template, go to the Requirements step, and use the buttons to add questions, documents and forms.
Add & Edit Documents
- General: In the "Document Title" and "Description (optional)" fields, enter general information about the document. The title and description will be visible in the customer portal.
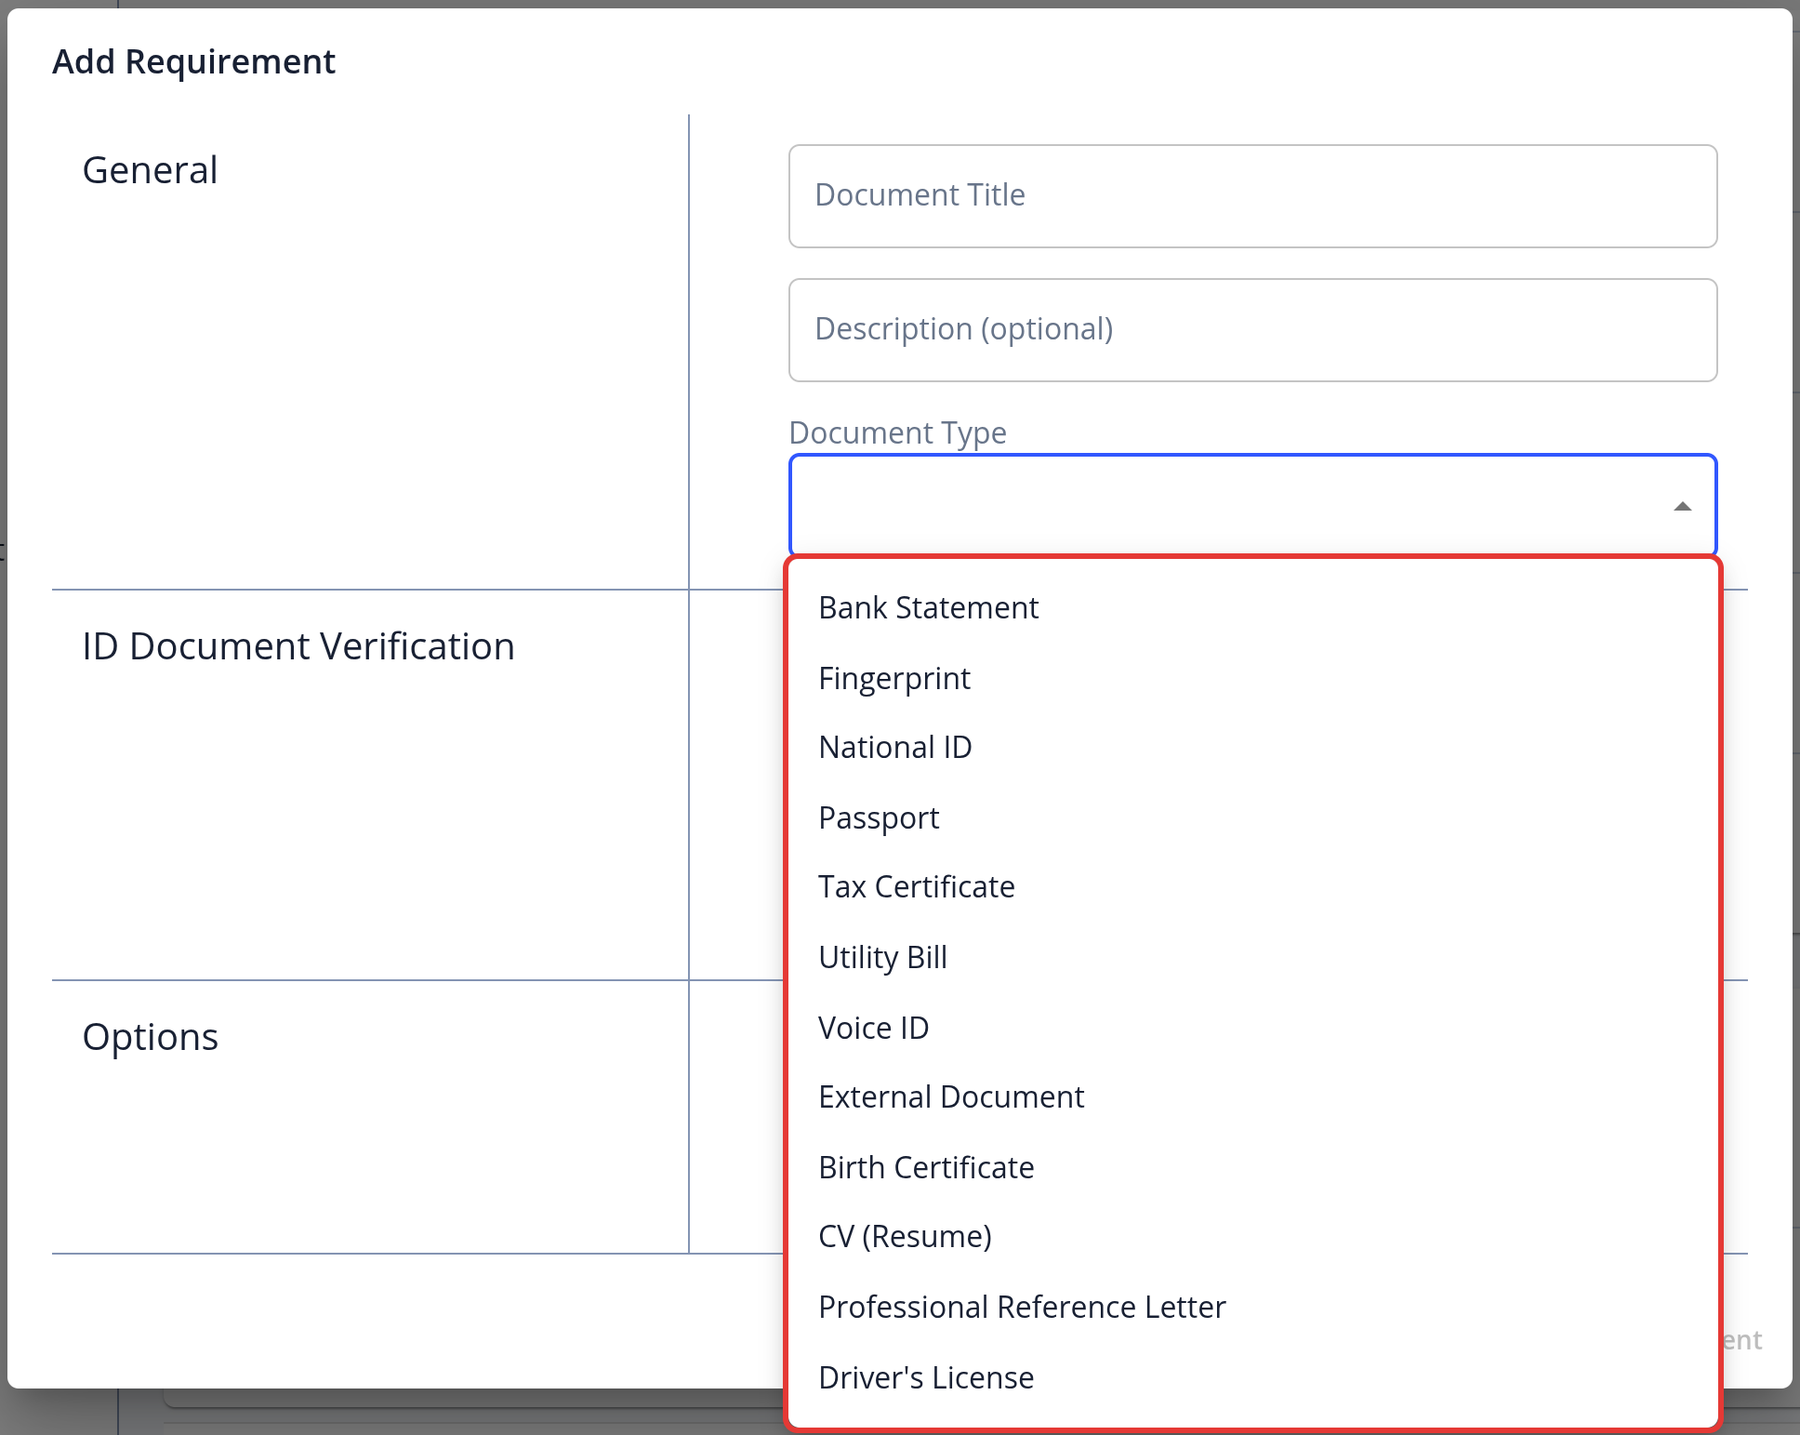
- Select a document type: Pick the appropriate type for the requirement, or select “External Document” if none of the other options fit. ID Document Verification options are only offered for the "Driver's License," "Passport," and "National ID" document types.
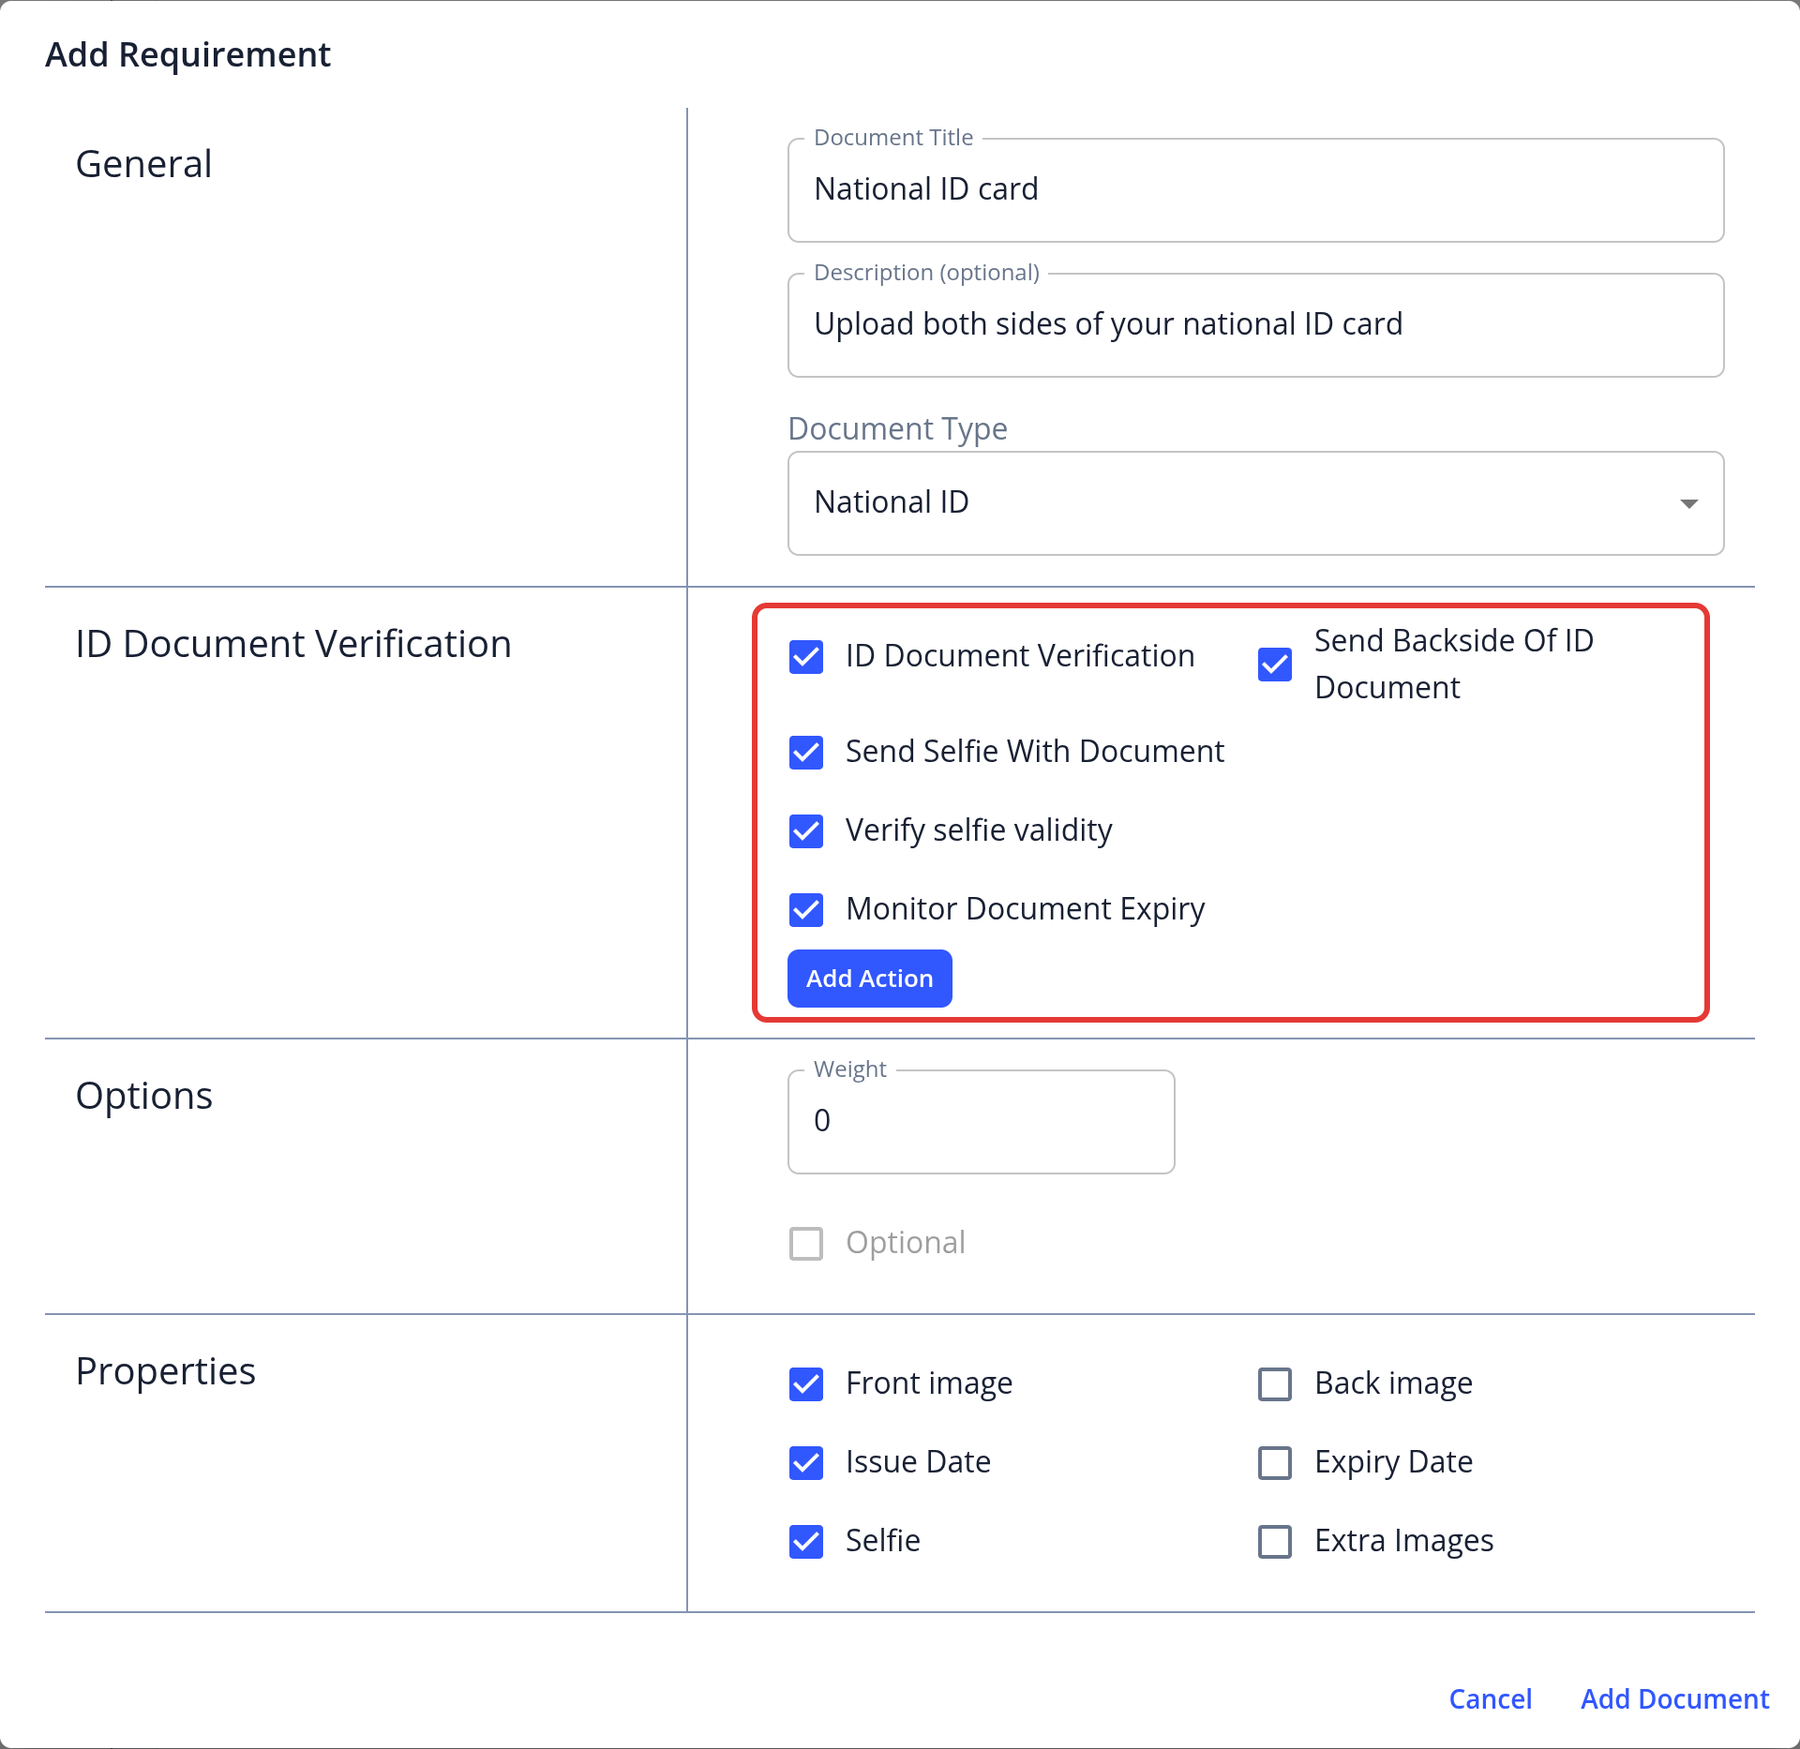
- ID Document Verification: For "Driver's License," "Passport," or "National ID" documents, these options may be available, depending on your plan:
- ID Document Verification - Run ID document verification on the uploaded document. It only runs when the template's Document verification flow type is "Send document uploads to verification if configured".
- Send Backside Of ID Document (Driver's License and National ID) - Ask the applicant to also upload the back of the document.
- Send Selfie With Document (Passport, National ID and Driver's License) - Ask the applicant for a selfie. Select the selfie property first.
- Verify selfie validity - Compare the selfie with the photo on the ID document.
- Monitor Document Expiry - Email managers or start a KYC Refresh before the document expires (see Document Expiry Monitoring).
- Options: To change the order of your documents, add a numeric weight. The customer portal shows documents from the lowest to the highest weight.
- To let the applicant skip the upload of this document, tick Optional. Optional can't be combined with ID Document Verification.
- Properties: Select the properties you'd like the applicant to provide. Each document type has its own properties. At least one property must be selected.
- Click Add Document (or Update Document when editing).
Add & Edit Forms
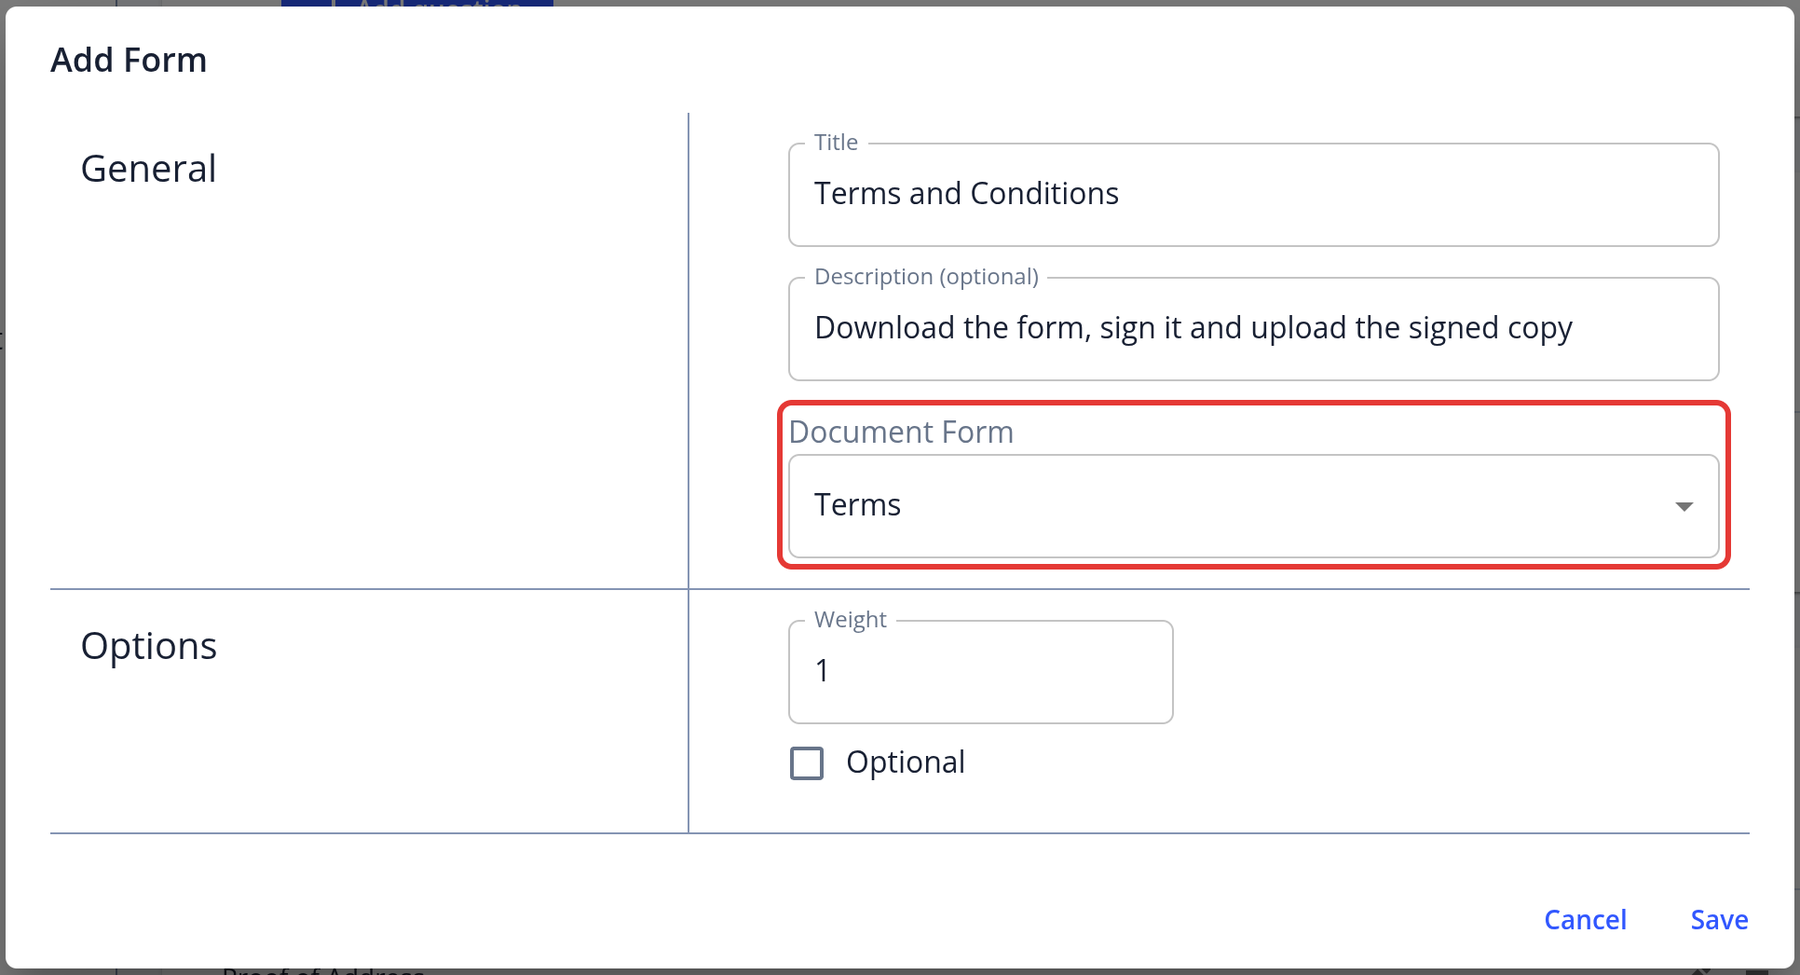
- General: Enter general information about the form. The title and description will be visible in the customer portal.
- Select a document form from the dropdown. This list shows all of the active KYC Document Templates in your instance.
- Options: If you'd like to change the ordering of your forms, you can add a weight. The customer portal will display forms in weighted order (from lowest to highest weight).
- If you want the applicant to be able to skip the upload of this form, you can check the "Optional" box.
- Click the Save button.
Add & Edit Questions
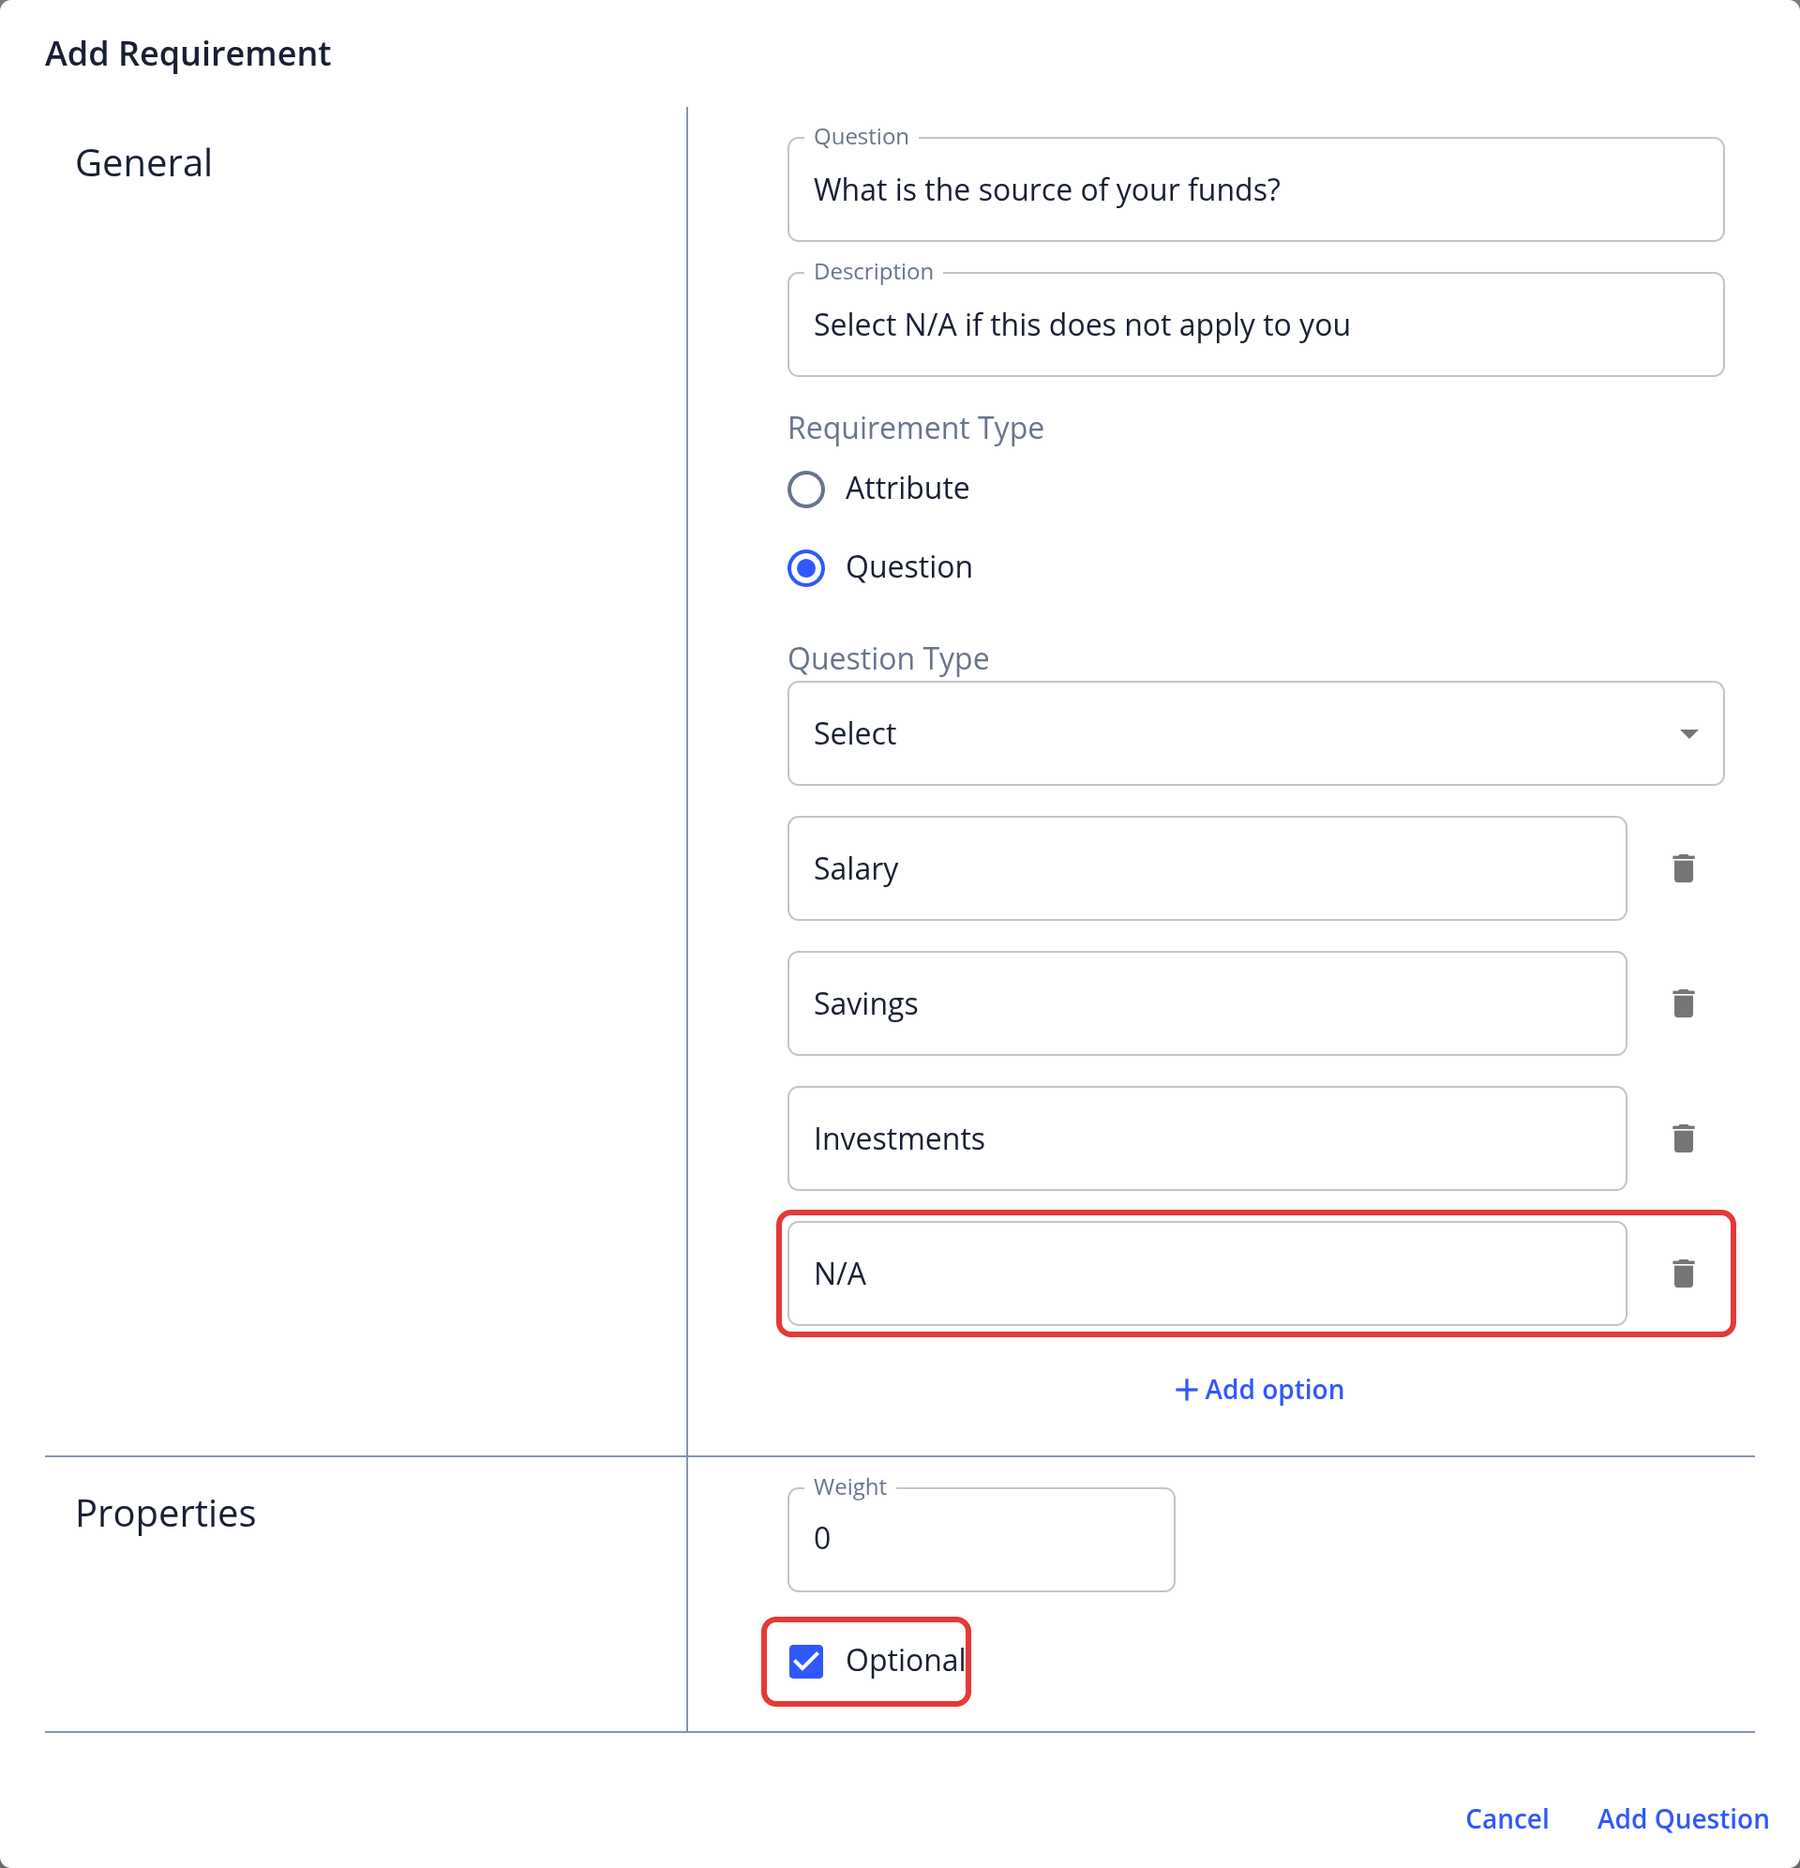
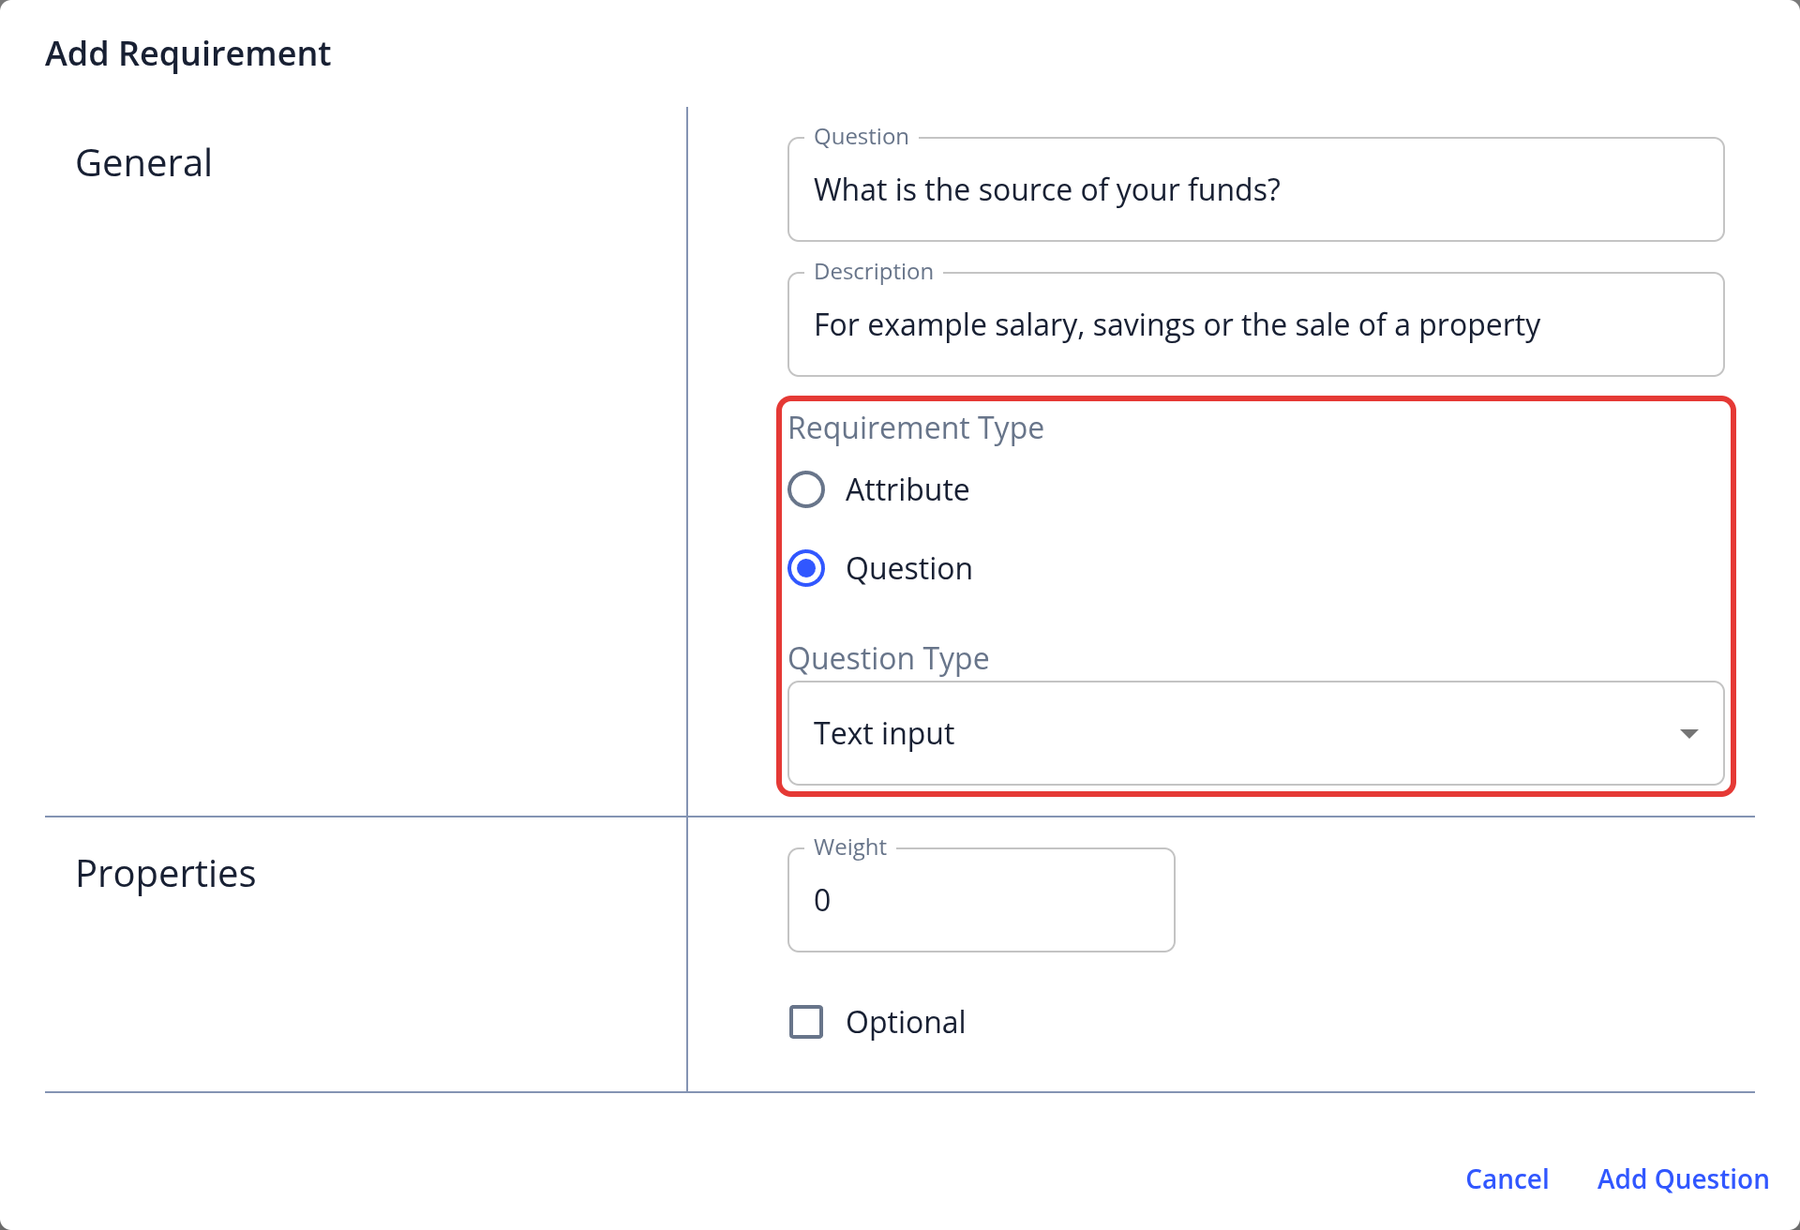
- General: Enter the question and an optional description. Both are visible in the customer portal.
- Under Requirement Type, choose Attribute or Question, then pick the attribute or question type. See the difference between the two below this list.
- Properties: To change the order of your questions, edit the numeric weight. The customer portal shows questions from the lowest to the highest weight (the default is 0).
- To let the applicant skip this question, tick Optional.
- Click Add Question (or Update Question when editing).
The available question types are Address, Blockchain address, Checkbox, Country, Date, Email, Phone, Select and Text input. For Checkbox and Select questions, use Add option to add the choices.
- Question types allow you to enforce a format for the applicant's answer, even if the question is not a common one in our list of attribute types. For example, the question "What is your favorite color?" can be left as a text input, whereas the question "What is your favorite country" can be given the "Country" question type so that the applicant will be given a list of countries to pick from.
- Attributes are specific, common pieces of information that you might require from an applicant. Not only do these attributes sometimes enforce the format of an answer (phone number, BTC address, Date of Birth, etc.), but they also allow our software to take actions with the answer that's provided. For example, the response given to a Nationality attribute can be used automatically for sanctions checks or risk scoring because our system knows that the answer is the applicant's nationality. If the "country" question type had been used instead, our system would not know that the response is the user's nationality.
- With this in mind, it is often best to use an attribute unless your question doesn't appear on the list of attributes, or if you have already used that specific attribute in this KYC Template. For example, if you need the primary and secondary address of an applicant, you can add the "Address" attribute for the primary address, and add a question with the "Address" type for the secondary address. This will avoid confusion about which value should be treated as the applicant's address by our system when cross-referencing it.
How can 'N/A' or similar be allowed as an input for non-mandatory fields?
There are two ways:
- Text questions: applicants can type "N/A" or similar into the field.
- Select questions: add an option such as "Not Applicable" or "N/A" with Add option, so applicants can choose it from the list.