Document templates and Terms & Conditions
The Document Templates tab gives Managers the freedom to configure and customize key document templates according to their needs. Document templates can be added to KYC Templates in one of two places: as a Legal Document (Terms & Conditions), or as a Form.
Example: A Manager will customize the ‘Terms and Conditions’ document to be used in their onboarding flow. This document template can then be made active and added to one or more KYC Templates in the Legal Document field.
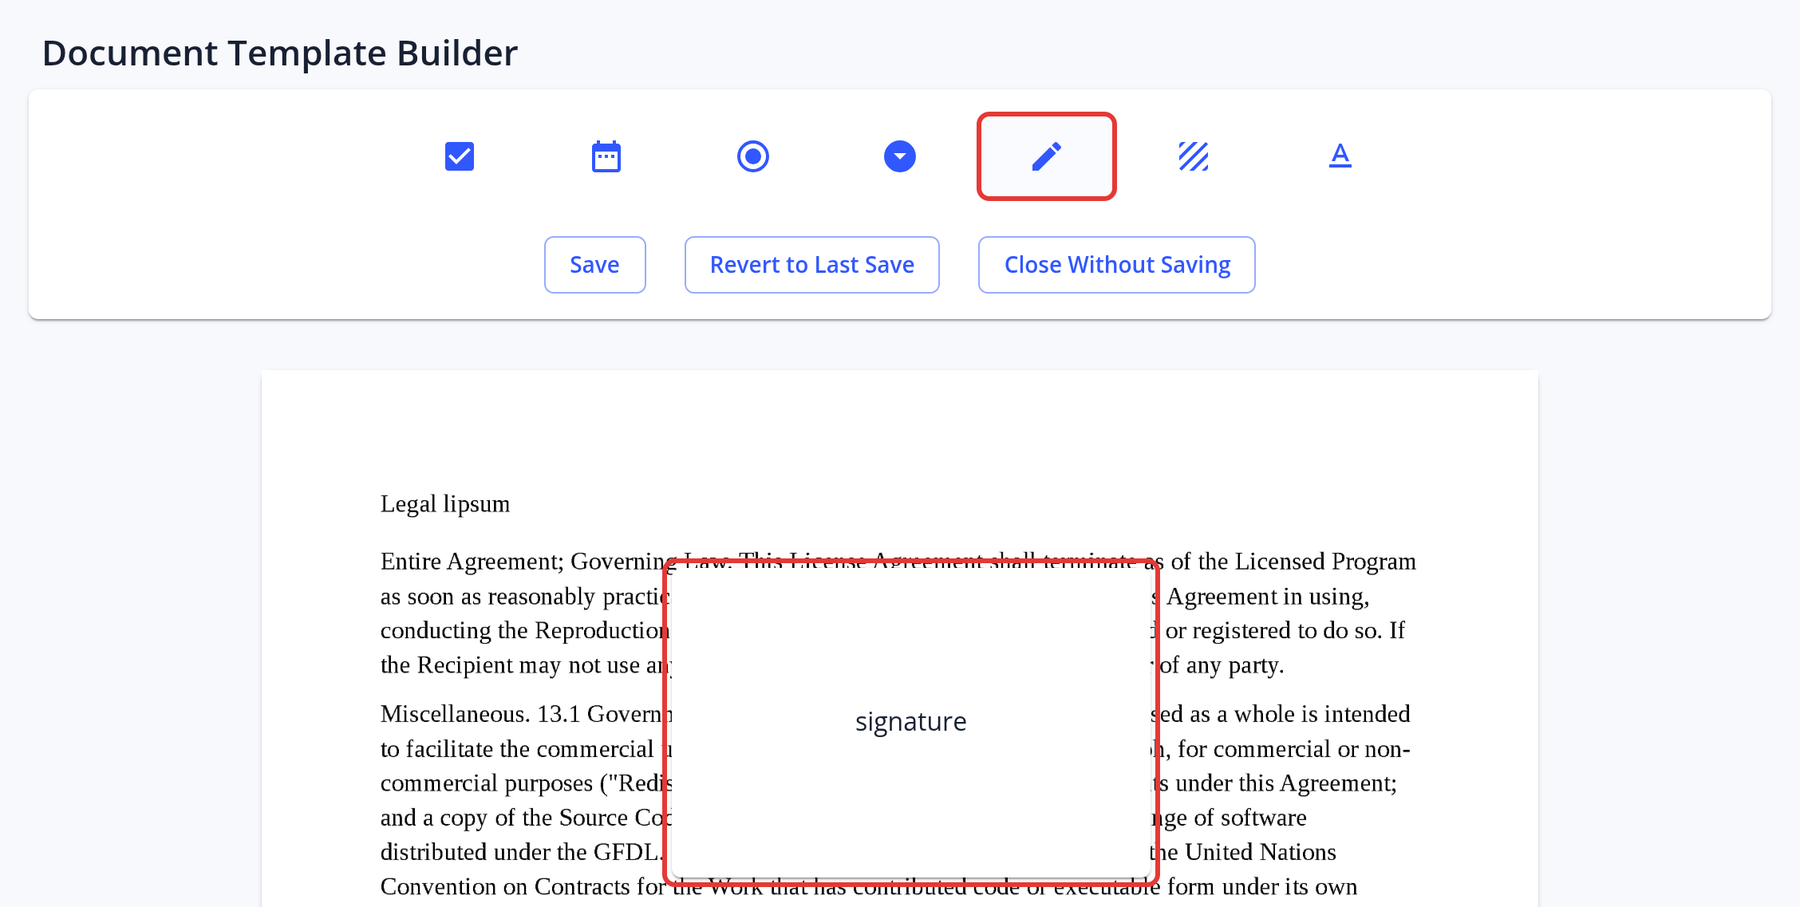
The document editor allows managers to add a signature box, date selector, check boxes and more.
How to create a document template
Managers can upload their own documents, such as Terms & Conditions or forms, and add fields that applicants fill in online:
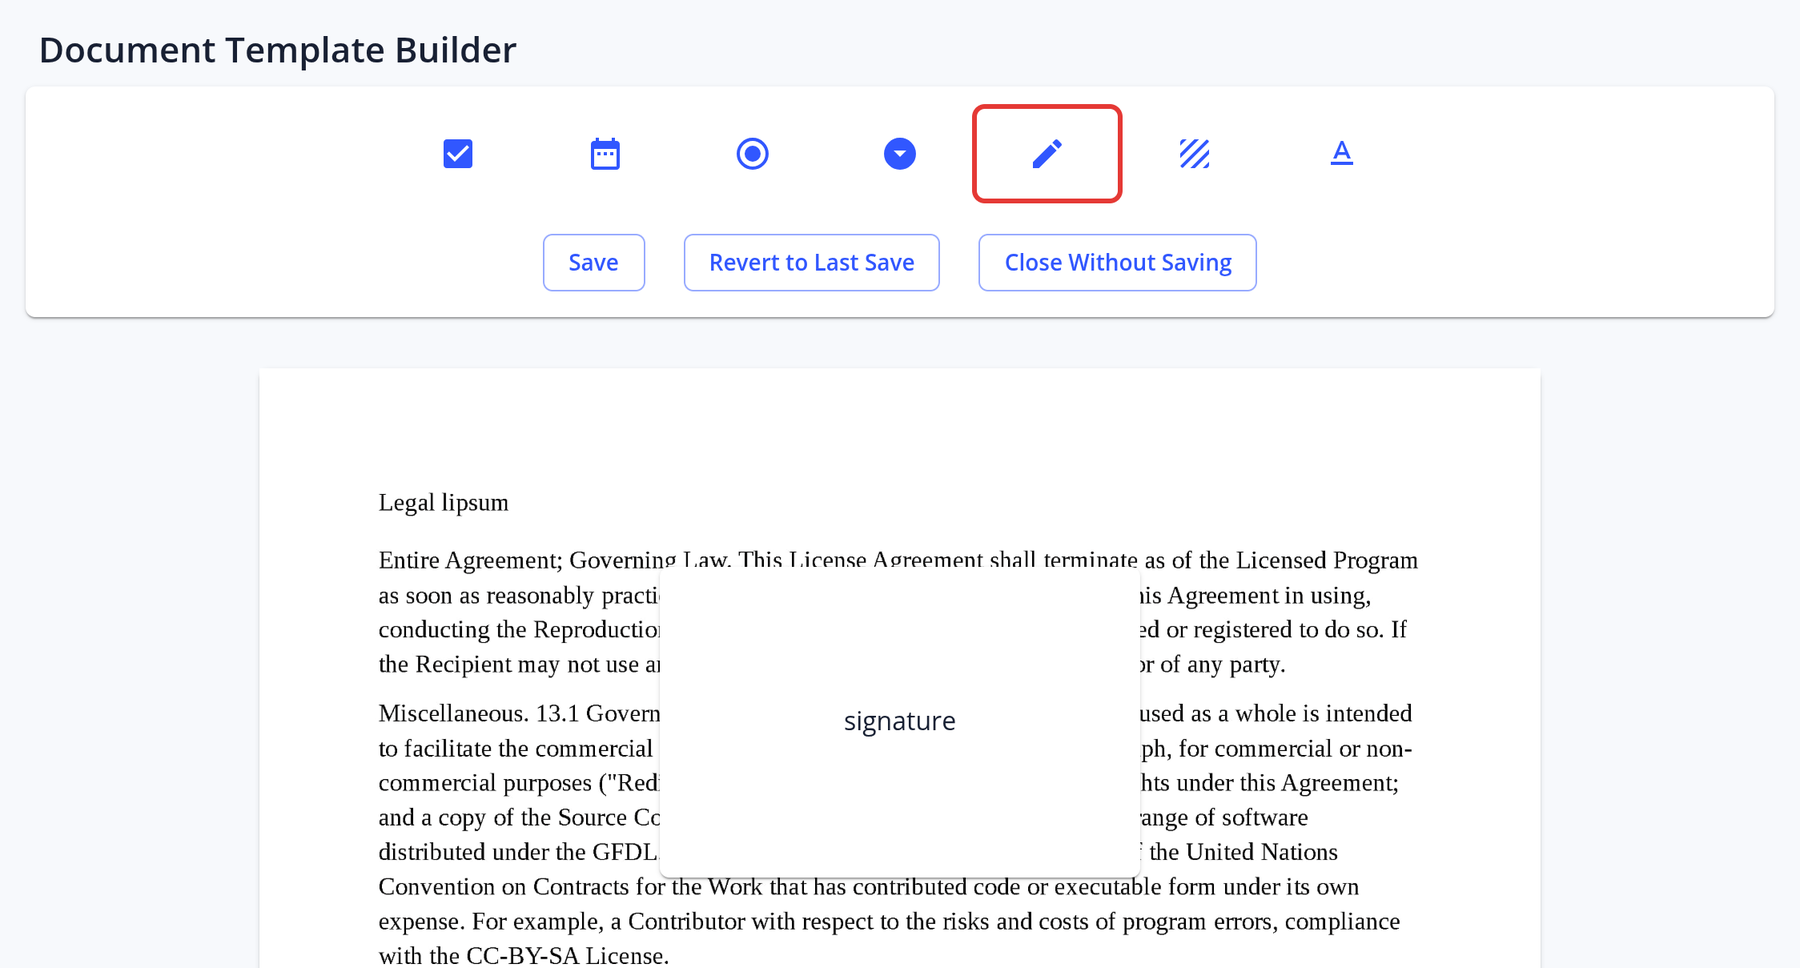
- Go to Document Templates and click New Document Template.
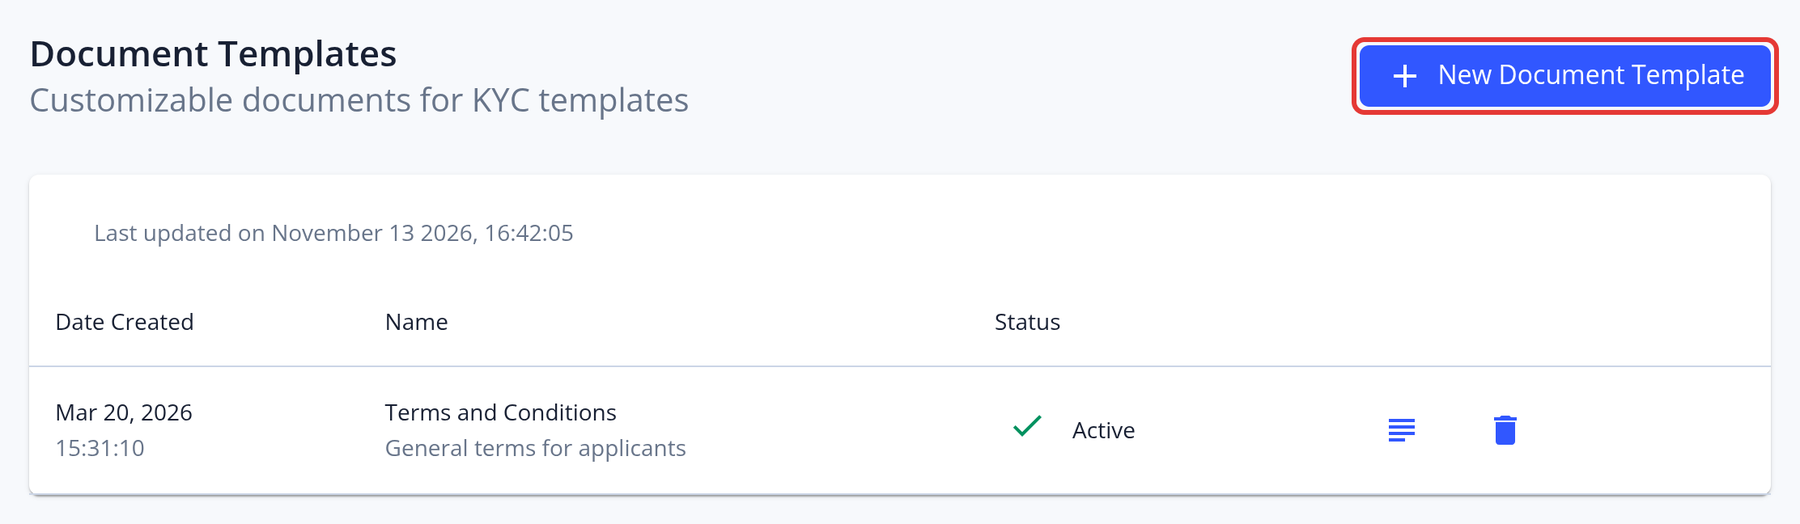
- Enter a title and a description (both are required) and click Create.
- In the File Upload section, click Upload File and choose a PDF, PNG or JPEG file. Use Replace File to upload a new version later.
- Tick Active so that the document template can be added to KYC Templates as the Legal Document or as a form. You can only activate it after a file has been uploaded.
How to add a signature field with the online form editor
The manager can add a signature field to the document which the applicant will be able to sign if the document template is added as the Legal Document for a KYC Template. If this doc template will be added as a form then the user will download it as a PDF and the signature field will not be visible.
After you've uploaded a Document Template, open the editor and add a signature field:
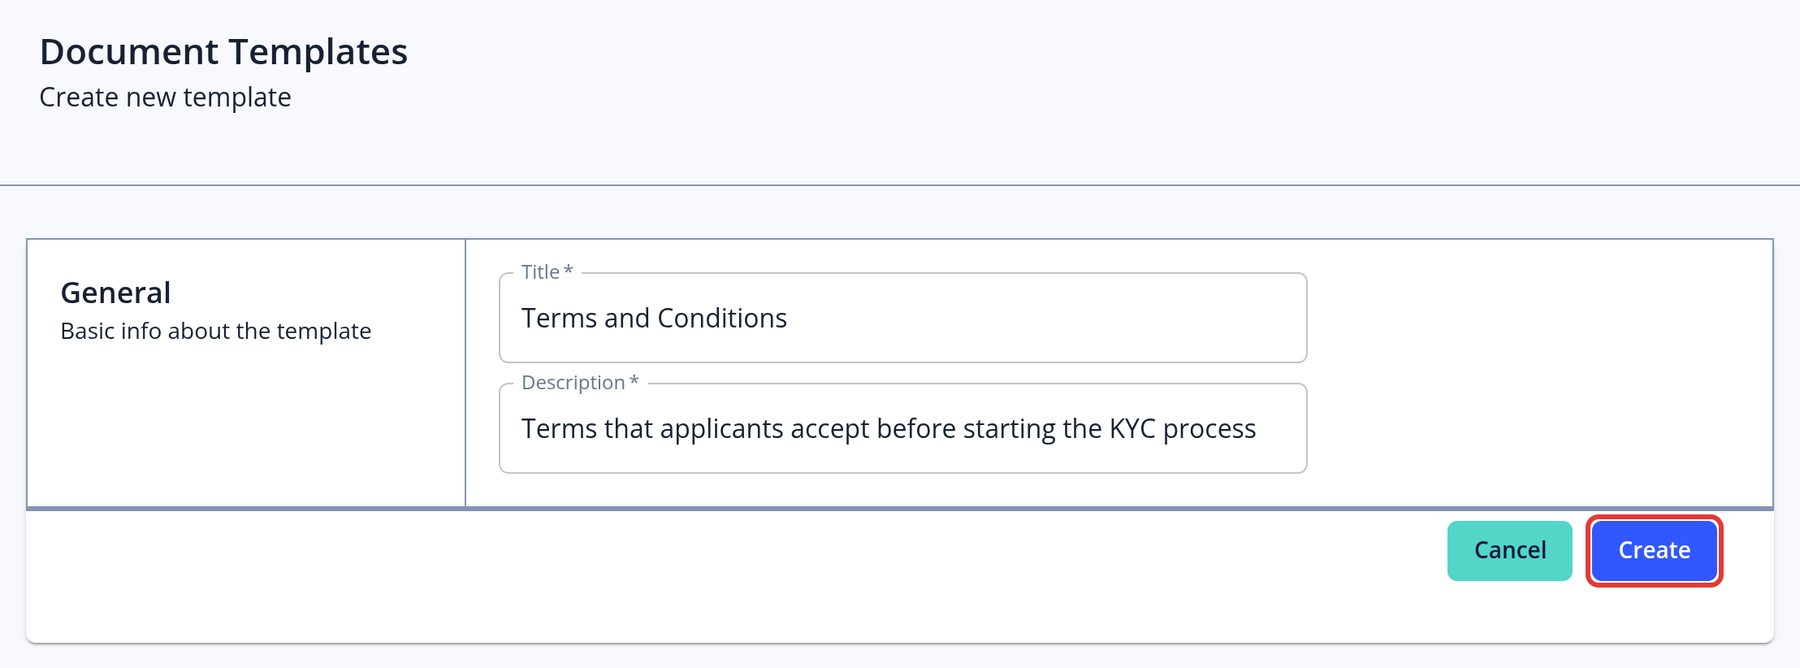
- Click Open Editor. If the file is still being processed, the editor asks you to wait; click Check Again after a moment.
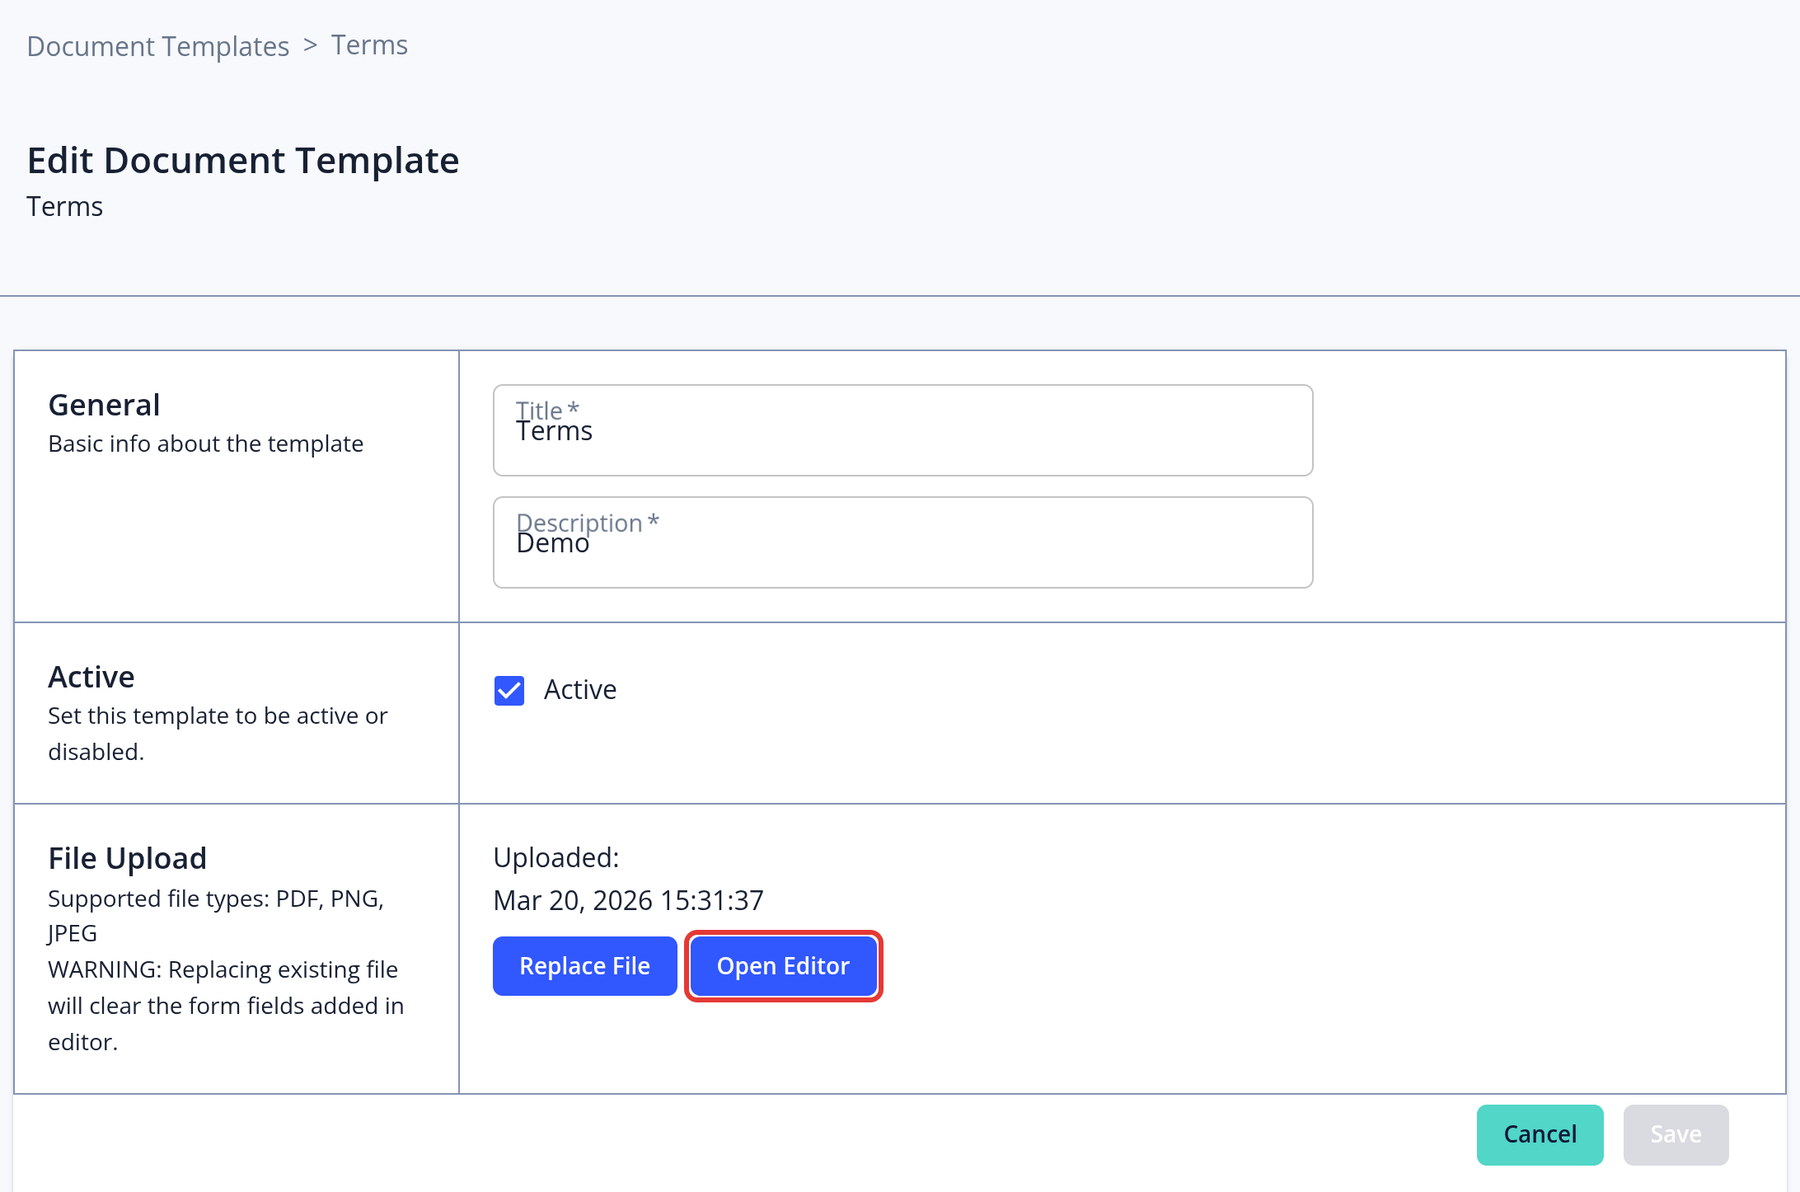
- In the tools panel, click the Signature tool (pencil icon). The field is added in the middle of the page.
- Drag the field to the right place and resize it as needed. The other tools add check boxes, dates, radio buttons, select lists, stamps and text fields.
- Click Save to save your changes, Revert to Last Save to undo them, or Close Without Saving to leave the editor without saving.
How to add the Terms & Conditions
Management Users can upload the Terms & Conditions to which applicants must agree to start the KYC process. These Terms & Conditions are displayed on the dashboard throughout the process. To do that, the manager has to create a new Document Template and add it to the correct KYC template:
- Once you have created the Terms and Conditions in Document Templates, go to KYC Templates in the left menu and click View And Modify on the template where you want to add them.
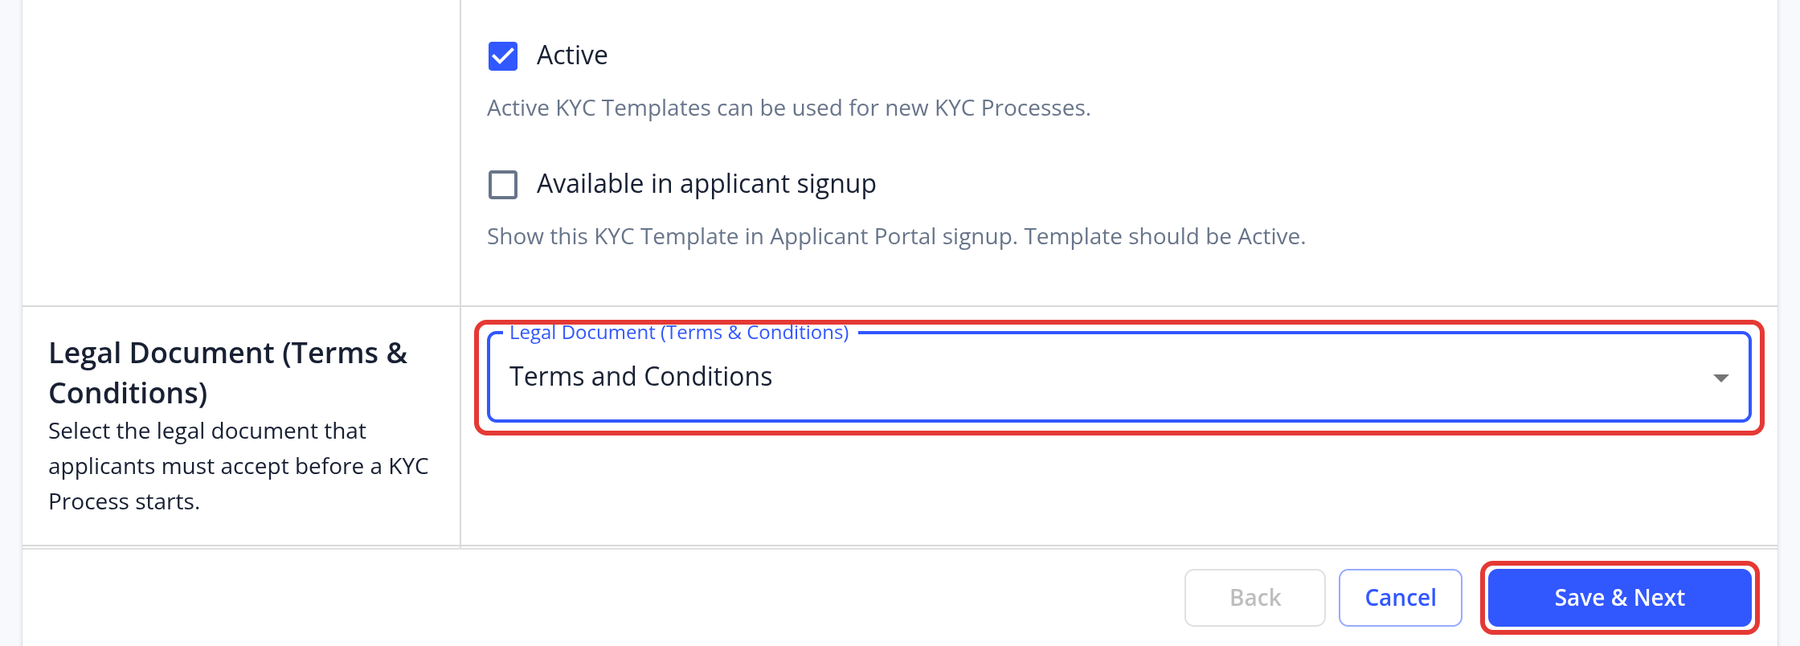
- On the Basics step, select your document template in Legal Document (Terms & Conditions), then click Save & Next:
Important when uploading the Terms & Conditions documentation:
- Upload a PDF file. PNG and JPEG images are also accepted.
- If your Terms & Conditions are composed of several documents, you will have to combine them into a single PDF file (not exceeding 42 pages regardless of the file size).
- When you have added your Terms & Conditions, please double check how they are displayed on the user interface. Make sure that the title of the document is displayed correctly in the customer portal. If not, edit your document and upload it again.