Setting up your instance
What inputs are required from you to set up the KYC-Chain application?
If you signed up online, you don't need to send us anything: see Signed up online? Use the Getting Started page below.
For enterprise contracts, our team personalizes the app for your company and project. You will receive a list of requirements with all necessary details for this customization. Some of the information required is:
Company (and project) details
- How would you like us to spell the name in the app and the url?
- Timeline and scale of your project
- Name and email address of the main point of contact from your company
Setup details
- E-mail address of the team members that will use the app
- Your terms and conditions
- Preferred method for sending emails from our app: Email sending is enabled as soon as your official email address and domain are verified by our system.
- Preferred storage location for your documents, on specific enterprise contracts. We can integrate with AWS S3 or Google Cloud.
Customer communications
- The email communications sent through our app can be customized at your request. Once the app is configured, please test it and let us know if there are changes that you'd like made to the wording in an email subject or body.
Styling
- Your logo (preferably a png image) and favicon can be used in the app
- Link to your style guide or listing of your brand hex codes that you would like us to use in the emails to customers.
Signed up online? Use the Getting Started page
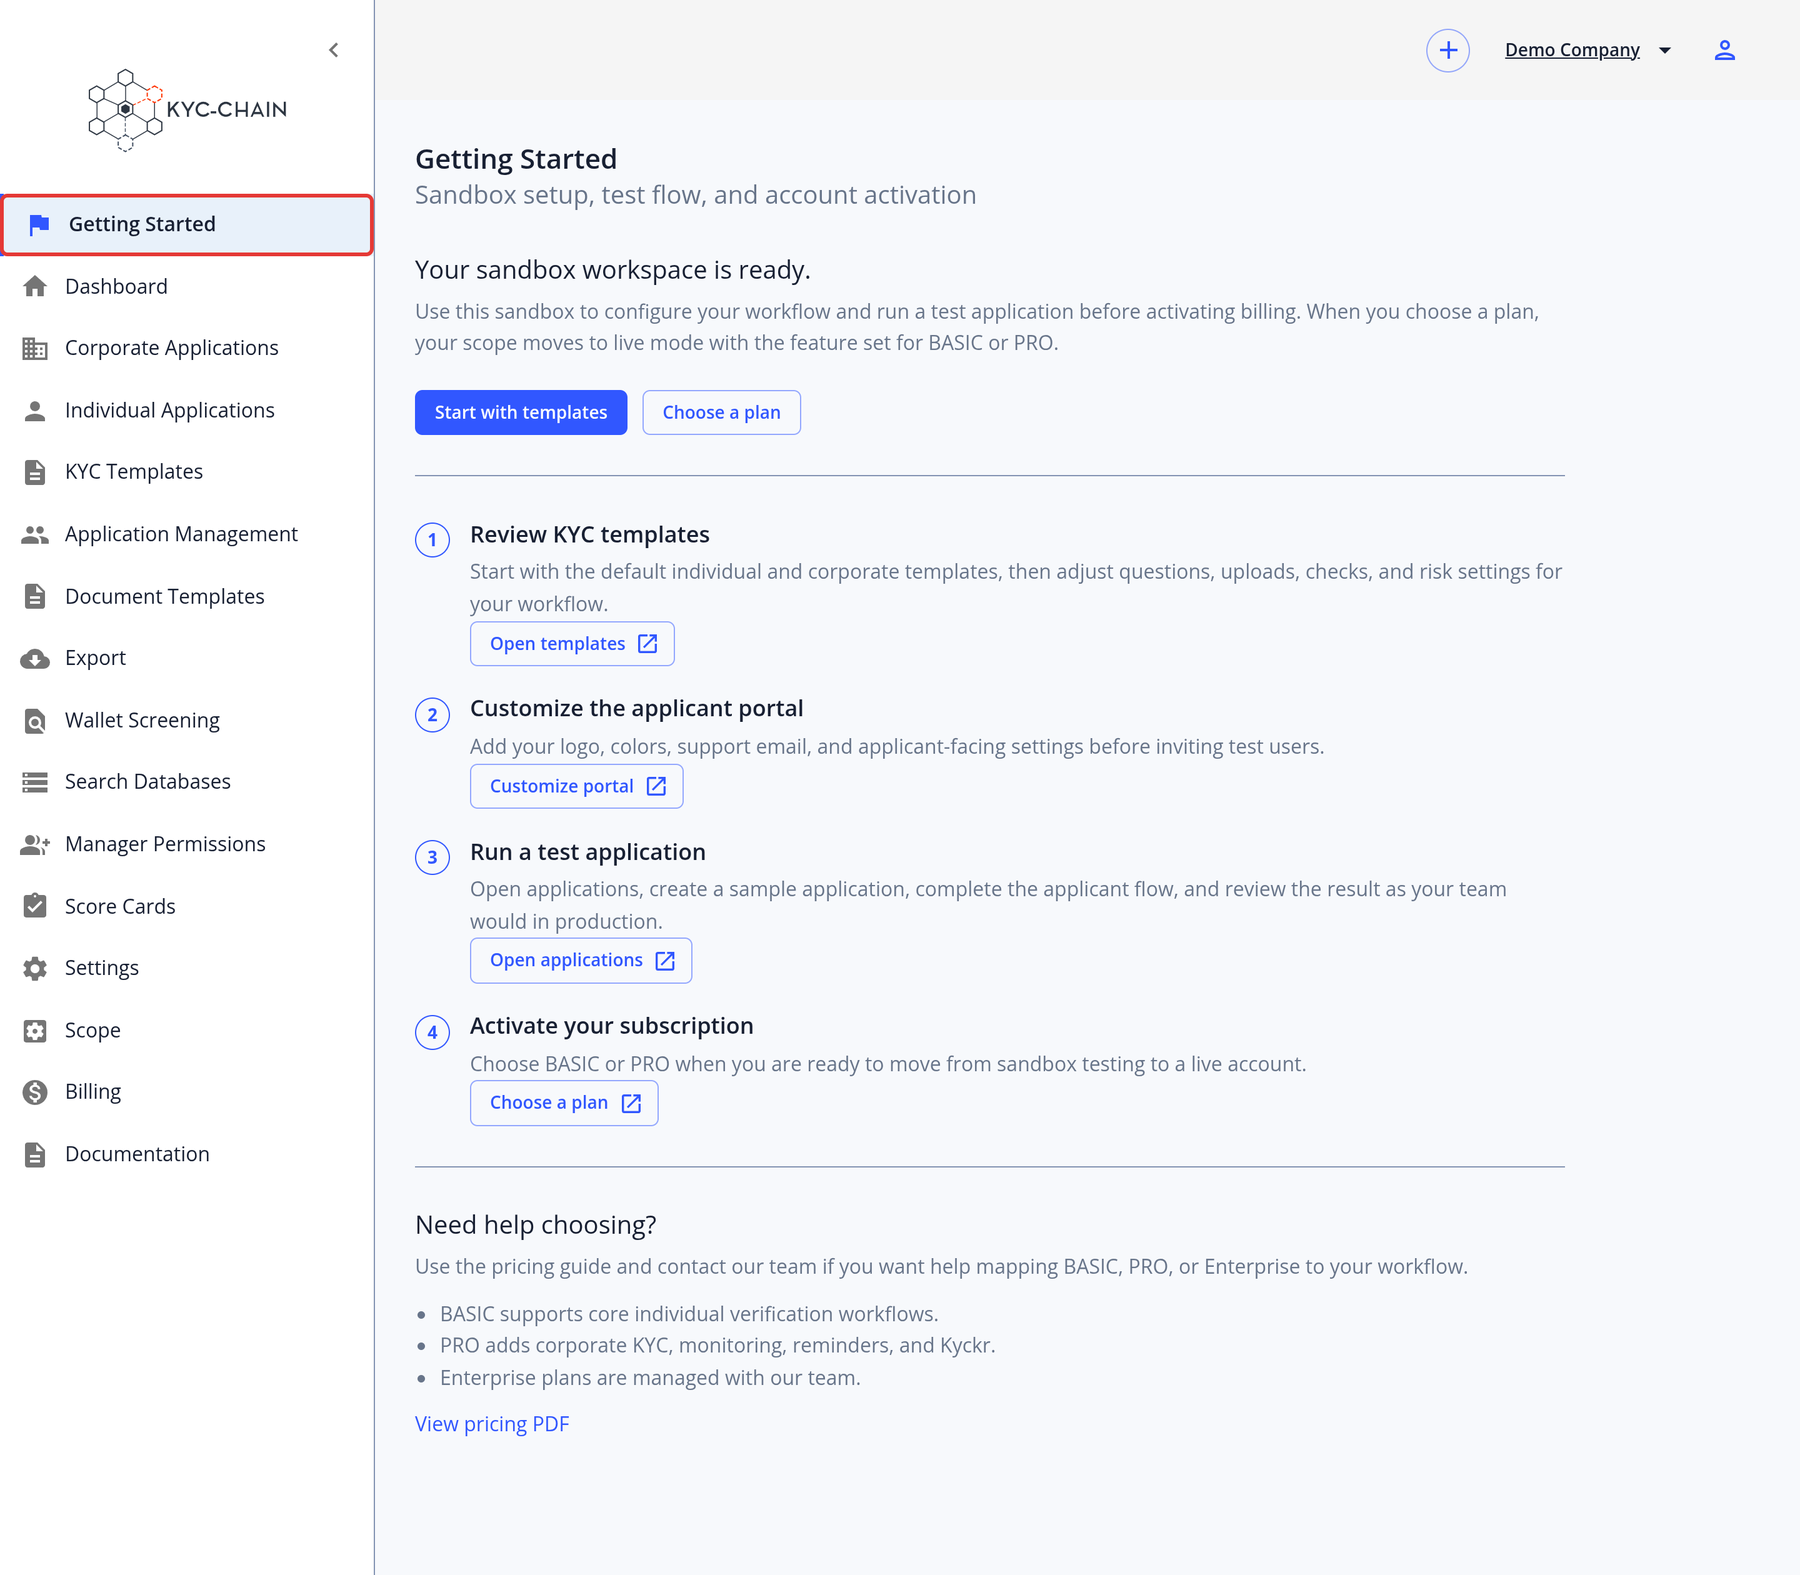
If you created your account through online sign-up, your instance starts in sandbox (test) mode, and the left menu shows Getting Started. This page guides you through the setup:
- Review KYC templates (Open templates): start with the default individual and corporate templates, then adjust the questions, uploads, checks and risk settings for your workflow.
- Customize the applicant portal (Customize portal): add your logo, colors, support email and other applicant-facing settings before inviting test users.
- Run a test application (Open applications): create a sample application, complete the applicant flow, and review the result as your team would in production.
- Activate your subscription (Choose a plan): choose BASIC or PRO when you're ready to move from sandbox testing to a live account.
The page also has Start with templates and Choose a plan shortcuts at the top and a link to the pricing PDF.
Checks in sandbox mode are not charged. When your plan is active, your instance switches to live mode with the features of your plan (see Plans and features). Until then, managers who can see billing get a banner asking them to choose a plan.
Sandbox mode also limits email. Until your plan is active, your instance sends at most 10 emails in any 24 hours to applicants and other people who aren't managers of your instance. This includes invitations, reminders, notes and status emails. Emails over the limit are dropped and not sent later. Sign-in and password emails, the link from Continue existing application, and emails to your own managers are always sent and don't count towards the limit.